Stone Restoration: How to Restore Surfaces Without Replacement
You’re standing in your kitchen, staring at cloudy water rings on your marble countertop, and your heart sinks. Replacement quotes run into the thousands, and you’re wondering if you’ll need to live with the damage or empty your savings. Here’s the good news: stone restoration can return most surfaces to their original beauty without the cost, mess, or downtime of tearing out your countertops or floors. In this guide, you’ll learn how to diagnose damage correctly, match the repair to your specific stone type, and choose between DIY fixes and professional restoration services. Whether you’re dealing with etch marks, deep stains, or hairline cracks, you’ll discover practical strategies to restore stone surfaces effectively and protect your investment for years to come.
Understanding Stone Damage: Why Stone Restoration Beats Replacement
Stone restoration involves renewing the surface of existing stone through cleaning, refinishing, and repair techniques, whereas replacement requires removing the damaged slab and installing new material. Understanding this distinction saves you significant money and disruption. The five common damage categories you’ll encounter include dull or cloudy surfaces, etching from acid contact, staining from spills, scratches from abrasion, and chips or cracks from impact. Each requires a different approach, but none automatically mean you need new stone.
Choosing to restore instead of replace offers compelling advantages. Restoration typically costs a fraction of full replacement and takes days rather than weeks, minimizing kitchen or bathroom downtime. You preserve the original material that has already acclimated to your home’s environment, avoiding the structural stress of demolition. Additionally, restoration maintains design continuity—matching decade-old stone patterns is far easier than sourcing identical new slabs.
Sometimes what looks like permanent damage is actually reversible residue. The Natural Stone Institute warns that excessive concentration of cleaner or soap may leave a film and cause streaks that mimic dullness or cloudiness on your surface. If your stone suddenly looks cloudy after cleaning, you might be dealing with soap buildup rather than etched stone. Always follow manufacturer recommendations for dilution ratios, rinse thoroughly after washing, and dry with a soft cloth to prevent residue accumulation that masks your stone’s true finish.
Diagnostic Guide: Is It a Stain, Etch Mark, or Scratch?
Before treating any damage, you must identify what you’re actually facing. Use this decision-tree framework to distinguish between the three most common stone problems. Stains appear as dark discoloration that lies beneath the surface—spilled wine or oil that has penetrated the stone. Etch marks result from acids dissolving the surface itself, leaving dull, lighter-colored spots that feel slightly rough to the touch, particularly on marble or limestone. Scratches manifest as physical grooves or abrasion marks you can feel with a fingernail, caused by dragging pots, utensils, or abrasive grit across the surface.
The critical distinction is treatability. Stains may be drawn out with poultices because they reside in the stone’s pores. However, etching cannot be removed without refinishing the stone because the acid has actually dissolved the surface material. As Daltile explains, for calcite-based stones like marble, mild acids can cause etching that cannot be removed without refinishing the stone. If you’re wondering whether etched marble can be repaired without replacing the slab, the answer is yes—but it requires honing and polishing rather than cleaning. Dull spots on marble countertops typically result from acidic foods, cleaning products, or toiletries contacting the surface and triggering chemical erosion.
Always test identification methods in an inconspicuous area first. Apply a drop of water to suspected etches—if it darkens the stone temporarily, you’re likely dealing with porosity rather than a true etch, though confirmation may require professional assessment. Never use acidic tests (like vinegar) to verify stone type, as this will cause new damage.
Calcareous vs. Siliceous Stone: Matching the Repair to Your Stone Type
Your stone’s mineral composition determines its vulnerability to cleaning agents and restoration techniques. Calcareous stones—including marble, limestone, and travertine—contain calcium carbonate, making them acid-sensitive. Even mild acids like lemon juice or vinegar will etch these surfaces. Siliceous stones such as granite, quartzite, and slate contain silicates or quartz, making them resistant to acids but not immune to all chemical attacks.
This classification fundamentally changes your cleaning approach. When choosing a natural stone supplier for replacement tiles or comparison samples to match your existing installation, companies like Stone Center provide expert guidance on material compatibility and care requirements. With calcareous stone, you must avoid all acidic cleaners and immediately wipe spills like wine or citrus. Siliceous stones tolerate acidic substances better, but they face other risks.
The Natural Stone Institute reinforces this, warning that acidic cleaners are extremely damaging to acid-sensitive stones such as marble and limestone, causing etching and dissolution. However, don’t assume granite is invincible. The Natural Stone Institute specifically warns that many commercially available rust removers and toilet bowl cleaners contain trace levels of hydrofluoric acid (HF), which attacks silicates. This means HF will damage all stone types, including granite and quartzite. Even “natural” cleaners like vinegar and lemon pose significant risks to calcareous stone and should never be used for routine maintenance.
DIY Stone Repair Techniques: Poultices, Crack Fixes, and Scratch Removal
Many surface issues respond well to careful DIY treatment, saving you service fees while extending your stone’s life. For deep stains that don’t respond to surface cleaning, the poultice method draws discoloration from the stone’s pores. Mix a liquid cleaner appropriate for your stain type with a white absorbent material like baking soda or diatomaceous earth to form a paste. Apply this mixture 1/4 to 1/2 inch thick, extending beyond the stain margin by at least one inch. Cover with plastic wrap, tape the edges, and allow it to dry for 24 to 48 hours. The drying action pulls the stain into the poultice. According to the Natural Stone Institute, difficult stains may require up to five applications, and some stains may never be completely removed.
Scratch removal differs between stone types. On marble, light scratches may be buffed out using marble polishing powder and a soft buffing pad, but deep scratches require professional abrasive refinement. Granite’s hardness makes DIY scratch removal nearly impossible without specialized diamond abrasives. For hairline cracks in granite or marble, DIY options include applying color-matched epoxy or stone repair kits, though achieving invisible repairs requires professional skill.
Using a Poultice to Draw Out Deep Stains
Prepare your poultice to a toothpaste-like consistency. Spread it evenly over the stain at 1/4 to 1/2 inch thickness, ensuring you cover at least one inch beyond the visible stain edge to capture spreading pigment. Cover with plastic wrap secured at the edges to prevent evaporation, allowing the poultice to dry completely over 24 to 48 hours. Remove the dried paste using a wooden or plastic spatula—never metal—to avoid scratching the stone. Be aware that poultice procedures may dull polished stone; you can restore shine afterward using marble polishing powder while buffing, or by calling a professional for re-polishing.
When to Avoid DIY Chemical Treatments
Never use commercially available rust removers or toilet bowl cleaners containing hydrofluoric acid (HF), as these will permanently damage even granite. Avoid mixing ammonia and bleach, which creates a lethal toxic gas. Skip strong acids and abrasive scouring powders, which the Natural Stone Institute warns may scratch certain stones or cause etching. These restrictions apply to all stone types and particularly to historic stone where irreversible damage violates preservation standards.
Honing and Polishing: Professional Techniques for Restoring Dull Stone Surfaces
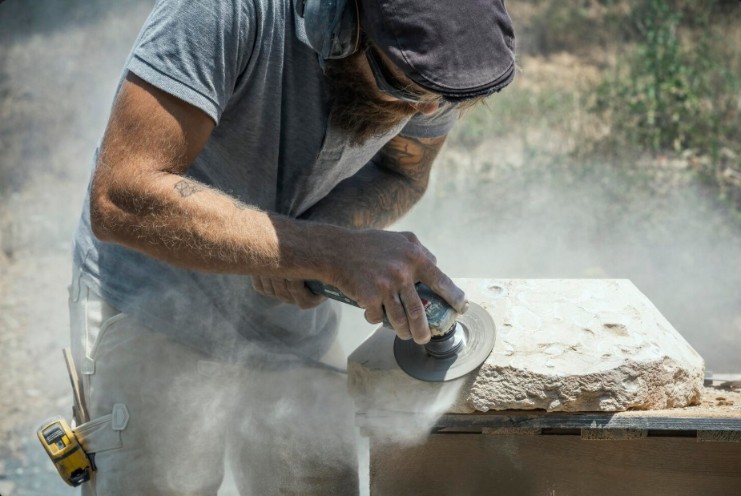
When DIY cleaning fails to eliminate dullness, professional restoration technicians employ honing and polishing to restore stone surfaces. Honing involves smoothing and leveling the stone using progressively finer abrasives to remove etching, scratches, and unevenness. This process creates a matte or satin finish. Polishing follows honing, using finer abrasives or polishing compounds to restore the stone’s reflective shine. Etched calcite-based stones require this refinishing process rather than cleaning—no amount of scrubbing will restore the dissolved surface.
Uneven shine or traffic lanes on floors develop from foot traffic patterns that wear down polished finishes in specific areas. Restoration professionals address these by honing the entire surface to a consistent level before polishing, eliminating the contrast between worn and unworn sections. The U.S. General Services Administration emphasizes the “gentlest method” approach, recommending test patches before full application to ensure compatibility with your specific stone and finish. For comprehensive stone restoration services including custom fabrication and matching new stone pieces to existing installations, specialized providers offer solutions that preserve historic character while repairing damage.
Professional Stone Countertop Repair in the USA: When to Hire an Expert
Certain damage signals require professional stone countertop repair rather than DIY attempts. Escalation triggers include deep scratches requiring abrasive refinement, structural cracks affecting stone integrity, historic stone where preservation concerns dictate specialist care, and situations where you cannot match sheen on spot-fixes. If you’ve attempted poultice application twice without stain removal, or if cracks show separation or movement, it’s time to call a certified technician.
When choosing between restoration and replacement, consider the stone’s structural integrity. Surface damage warrants restoration; broken slabs or widespread cracking may require replacement. Professional restoration services in the USA offer certified technicians trained by the Natural Stone Institute who understand regional stone varieties and climate considerations. They possess diamond abrasive equipment necessary for granite repair and marble restoration that homeowners cannot rent effectively. Can a chipped stone countertop edge be repaired invisibly? Yes—professionals use color-matched epoxy and polishing techniques that blend repairs seamlessly, something rarely achievable with over-the-counter kits.
Natural Stone Maintenance: Daily Care and Sealing Best Practices
Daily maintenance prevents the damage that necessitates restoration. Clean stone surfaces using a neutral cleaner, stone soap, or mild liquid dishwashing detergent and warm water, as recommended by the Natural Stone Institute. Rinse thoroughly and dry with a soft cloth to prevent water spots and residue buildup. Does sealing stone prevent etching? No—sealing primarily addresses stain resistance, not acid damage.
Sealing products in the stone industry are actually “impregnators” that act as repellents rather than true seals. They improve stain resistance but do not make stone stain-proof. Many granites receive factory resin treatments that affect sealing needs, so consult your installer about whether your specific stone requires sealing. For property managers, maintenance plans should include daily neutral cleaning, immediate spill response protocols, quarterly inspections for sealant effectiveness, and specialized considerations for outdoor stone where algae and biological growth require appropriate cleaners that won’t damage the stone.
Understanding Impregnators and Realistic Sealing Expectations
Impregnators penetrate the stone to create a repellent barrier against staining agents, but they do not form a surface film. This means they make stone more stain-resistant but not stain-proof, and they provide no protection against etching from acidic substances. Factory resin treatments in many modern granites fill natural pores during manufacturing, potentially reducing the need for additional sealing. Distinguish between sealing benefits (stain resistance) and etching prevention (requires avoiding acids entirely)—no impregnator prevents acid damage.
Stone restoration offers a practical, cost-effective alternative to replacement when you understand your stone’s specific needs and damage types. Remember three key principles: always diagnose whether you’re facing a stain, etch, or scratch before treating; respect the chemical differences between calcareous and siliceous stone to avoid causing new damage; and recognize when professional honing, polishing, or crack repair will deliver better results than DIY attempts. By following daily maintenance protocols with neutral cleaners and realistic expectations about sealing, you preserve your stone’s beauty for decades. Start with a careful inspection of your damaged area, test any cleaning method in a hidden spot, and consult a certified restoration professional when structural damage or deep etching requires expert intervention.