Plumbing Installation Tips That Prevent Costly Mistakes (USA)
Imagine finishing a weekend bathroom refresh, only to discover water stains spreading across the ceiling below three weeks later. In American homes, plumbing systems handle tremendous daily demand—EPA WaterSense reports the average family uses more than 300 gallons per day, with roughly 70 percent of that occurring indoors. When you grasp the sheer volume moving through your pipes, you realize why small installation errors escalate quickly into costly repairs.
Understanding Your Home’s Plumbing System and Water Use
Your home operates on two distinct networks: the pressurized potable water supply bringing fresh water in, and the gravity-based Drain-Waste-Vent (DWV) system carrying wastewater out. Potable water is safe for consumption, while non-potable sources include irrigation or untreated gray water—never allow cross-mixing during installation. “Wetted surfaces” refers to interior pipe areas contacting drinking water, a critical concept when selecting compliant materials.
The most common plumbing installation mistakes DIYers make include ignoring proper slope on drain lines, mixing incompatible piping materials without adapters, and underestimating how household water use stresses connections. High daily volume magnifies every drip; a joint that weeps slightly still wastes thousands of gallons annually. Before attempting any work, study this plumbing installation guide section carefully. While most residential projects use copper or PEX, some advanced projects may involve specialized systems. For those exploring modular aluminum piping for non-potable fluid or compressed air lines in a workshop or garage, companies like Unipipe Solutions offer integrated solutions. Additionally, EPA research indicates lead can enter drinking water when plumbing materials corrode, making material selection part of your initial system understanding. Understanding these plumbing best practices establishes the baseline knowledge needed before turning any wrench.
Navigating Plumbing Code Requirements: Model Codes vs. Local AHJ
You might think plumbing rules are universal across the USA, but installation standards actually flow from model codes adapted to local conditions. The International Plumbing Code (IPC) and International Residential Code (IRC) serve as widely adopted model codes that provide baseline requirements for pipe sizing, material standards, and fixture placement. However, your local Authority Having Jurisdiction (AHJ)—typically your city or county building department—holds final say over which edition applies and what amendments exist.
This distinction matters because plumbing code requirements vary significantly by municipality. Generally, installing new supply or drain lines, relocating fixtures, or altering DWV configurations triggers permit and inspection requirements. You should never assume a “simple” project bypasses oversight. To verify local requirements, contact your AHJ directly or consult their published code adoption tables online. Ask specifically which model code year they enforce and whether they require inspections for rough-in versus final connections.
Do you need a permit to move plumbing or install new supply/drain lines? In most jurisdictions, yes—any modification to the fixed piping infrastructure requires permitting. Finding your local requirements starts with a phone call to your building department or a visit to their website’s permit portal.
Learning how to install plumbing correctly begins with respecting this regulatory layer. Model codes ensure safety and interoperability, but local amendments address regional issues like seismic activity, freeze protection, or water scarcity. Always pull permits when required; unpermitted work can void insurance coverage and create resale complications. Remember that code compliance isn’t bureaucratic red tape—it is the framework that prevents contaminated water, sewer gas intrusion, and structural flooding. When in doubt, request a pre-work consultation with your local inspector to clarify expectations before cutting into walls or trenches.
Selecting Lead-Free Materials and Fixtures
When you replace a faucet or solder a joint, you’re directly influencing water quality. The Safe Drinking Water Act defines “lead-free” with specific thresholds: a weighted average of 0.25% lead across wetted surfaces of pipes, fittings, and fixtures, plus 0.2% lead for solder and flux. These aren’t marketing terms—they’re federal standards enforced by the EPA.
Pre-2014 fixtures often contain higher lead content, as the Reduction of Lead in Drinking Water Act took full effect in January 2014. Today, compliant products bear certification marks from accredited bodies, which you can identify using EPA’s certification mark guidance. Look for NSF/ANSI 61 or 372 markings on packaging before purchasing.
The EPA states there is no safe level of lead exposure, meaning every percentage point matters for drinking water systems. Applying plumbing best practices means verifying product dates and certifications before installation, not after. When soldering, use only lead-free flux and solder paste labeled compliant with the 0.2% standard. This approach demonstrates how to install plumbing correctly while protecting neurological health, particularly for infants and pregnant women. Don’t rely on “low-lead” labeling; confirm the exact compliance certification to ensure your renovation doesn’t introduce contamination risks into otherwise safe municipal water.
How do you reduce lead exposure from faucets and fixtures? Prioritize certified lead-free replacements for any component installed before 2014, flush stagnant water from taps each morning, and never use hot water directly from the tap for cooking or formula preparation, as heat increases lead leaching from older fittings. When installing new stops or angle valves, verify the brass alloy meets current standards rather than assuming newer is automatically safer.
Drain Slope, Traps, and Venting: Preventing Leaks and Odors
Drainage failures often manifest as slow drains or mysterious gurgling sounds—both symptoms of installation errors that require immediate attention. The International Plumbing Code specifies minimum slopes in Section 704.1, requiring typically 1/4 inch per foot for standard household drains to ensure gravity moves waste efficiently without leaving solids behind.
Every fixture requires a P-trap—that U-shaped bend beneath sinks and tubs—holding a water barrier between your living space and sewer gases. This “trap seal” must measure between 2 and 4 inches deep according to ICC model codes. Too shallow, and siphonage from draining fixtures can break the seal, allowing harmful gases to enter. Venting prevents this siphonage by equalizing pressure throughout the system.
Understanding venting terminology helps you troubleshoot issues. An individual vent serves a single fixture trap, connecting to the vent system above the fixture or terminating outdoors. A vent stack serves as the primary vertical vent pipe providing air circulation throughout the drainage system. Without adequate venting, water rushing down one pipe can siphon traps elsewhere, creating the gurgling sounds that signal broken seals.
What happens if drain pipe slope is insufficient? Waste accumulates, creating blockages and slow drainage. Why do drains gurgle after plumbing work? Usually because venting was omitted or restricted during renovation. What causes slow drains after a new installation? Often flat or back-pitched sections where solids settle. Addressing these venting and slope issues early represents practical plumbing installation tips that prevent hidden failures and callbacks.
Consider the Thompson family in Ohio who recently finished their basement bathroom. They installed the shower drain with a visually “slight” slope that appeared adequate to the eye. Within three months, soap scum accumulated in the flat section, creating a clog that required tearing out the new tile shower pan to correct the grade. This scenario illustrates why measuring beats estimating.
Slope Verification Checklist: – Use a 4-foot level with 1/4 inch markings or a digital inclinometer – Measure total drop over the pipe’s horizontal run (10 feet = 2.5 inches minimum) – Account for horizontal offsets around framing that reduce effective slope – Photograph measurements before insulation covers pipes for inspector documentation
Setting Correct Drain Slope Over Real Framing
Real-world framing rarely cooperates with ideal measurements. When floor joists obstruct your route, use a torpedo level marked with slope indicators or a digital level set to 2% grade to verify the 1/4 inch per foot minimum. Secure pipes only after confirming consistent pitch toward the main drain, using adjustable hangers to maintain angle across uneven joists. Taking time to verify slope before closing walls prevents the excavation and re-piping that follows drain line failures.
Trap Seal Depth and Venting Requirements
Maintain exactly 2–4 inches of water in traps; deeper seals can clog, while shallower ones evaporate or siphon away. Install vents according to fixture units and developed length limits specified in code. When you hear gurgling, inspect for disconnected vents or improper slope—these audible warnings indicate negative pressure breaking your trap seals and introducing sewer gas risks. Each plumbing fixture must be separately trapped per the IRC, never relying on double-trapping or shared seals that violate code.
Common Plumbing Installation Mistakes That Cause Costly Repairs
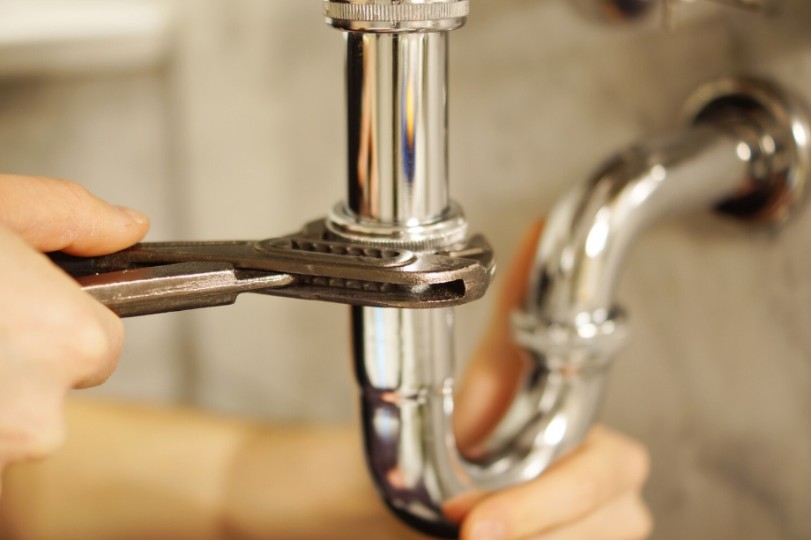
Even careful DIYers fall prey to technique errors that create delayed failures. Overtightening fittings ranks among the most damaging common plumbing installation mistakes—excessive torque cracks brass fittings, deforms plastic threads, and compromises rubber gaskets. Using standard adjustable wrenches on chrome-plated brass mars the finish and creates stress risers where corrosion begins.
Last winter, a homeowner in Colorado proudly installed a new pedestal sink, tightening the chrome P-trap connections with channel-lock pliers until they “felt secure.” Two weeks later, the deformed compression nut cracked during a freeze-thaw cycle, flooding the bathroom while the family was away. The $15 fix became a $4,000 flooring and ceiling repair, demonstrating why costly plumbing repairs prevention starts with proper technique.
Mismatched material transitions without proper adapters cause galvanic corrosion. Connecting copper directly to steel creates an electrochemical reaction that eats through pipes within months. This principle of using correct fittings and adapters is universal across all piping systems. It applies whether you’re joining standard residential pipes or performing a specialized task like a saddle drop installation on a modular compressed air line.
Similarly, failing to stage leak tests before closing walls transforms minor drips into mold remediation projects. EPA WaterSense data reveals that average household leaks waste more than 10,000 gallons annually—enough to fill a swimming pool and representing significant DIY plumbing errors to avoid.
Tool Selection Guidelines: – Basin wrenches for faucet nuts under sinks – Strap wrenches for chrome or plastic finished surfaces
– Torque-limiting screwdrivers for PVC compression fittings – Pipe thread sealant appropriate for the specific material (PTFE tape for metal, pipe dope for plastic-to-metal)
How tight should fittings be? Hand-tight plus a quarter-turn with proper wrenches usually suffices; resistance should feel firm, not forced. For costly plumbing repairs prevention, always match tooling to material—strap wrenches for finished surfaces, pipe wrenches for iron.
Overtightening and Tool Damage Risks
Chrome vanity drains and plastic P-traps crack under excessive force. Regular slip-joint pliers chew through soft metals, creating microscopic fractures that leak months later. Use basin wrenches for tight spaces under sinks, and apply thread sealant or tape as specified by manufacturer torque ratings. When you feel the fitting seat, stop—muscle beyond that point invites cracked nuts and stripped threads that necessitate emergency shut-offs and replacement parts.
Staged Leak Testing Before Closing Walls
Never skip the pressure test. First, perform visual inspections of all joints under bright light, looking for weeping or moisture. Next, isolate sections and pressurize with air or water per local code requirements, checking for pressure drops over 15 minutes. Finally, cycle hot and cold water through the system repeatedly, then retest joints—thermal expansion often reveals leaks invisible during initial testing. This three-stage approach prevents the hidden moisture that breeds mold and structural rot behind your walls.
Backflow Prevention and Cross-Connection Control
EPA defines cross-connections as actual or potential connections between non-potable sources and drinking water that could allow contaminants to enter through backflow. Backflow itself constitutes unwanted reverse flow of used or non-potable water back into clean distribution—exactly what plumbing best practices must prevent. EPA notes that lead can enter drinking water through various contamination pathways, making cross-connection control essential for safety.
Common residential cross-connection hazards include garden hose bibbs left submerged in pools or attached to chemical sprayers, utility sinks with submerged hoses, and irrigation systems tied directly to potable lines without protection. These scenarios create serious health risks when pressure drops or backsiphonage occurs, potentially drawing pesticides, fertilizers, or sewage into your drinking water.
Installing air gaps—the physical separation between a faucet outlet and the flood level of a fixture—provides the simplest protection. Where air gaps aren’t feasible, backflow prevention devices like vacuum breakers or reduced pressure zone assemblies stop contaminated water from reversing course. Addressing these risks helps prevent plumbing leaks of contaminated water into your family’s drinking supply, protecting against bacterial, chemical, and sediment intrusion that standard filtration cannot remove.
When installing new hose bibbs or utility sinks, always verify they include integral vacuum breakers or install external protection. For irrigation systems, local codes typically require annual testing of backflow assemblies by certified technicians. During any renovation that moves water lines, evaluate whether you’re creating new cross-connection risks—what was safe before may become hazardous when you reroute supply lines closer to drainage points. Document your backflow prevention measures for future homeowners and inspectors.
Hot Water Safety and Temperature Control After Installation
New fixture installations alter how water flows through your home, sometimes masking or creating scalding risks that require immediate attention. The Department of Energy recommends setting water heaters to 120°F for energy efficiency and safety, while many manufacturers ship units preset at 140°F. This discrepancy creates temperature control challenges you must address post-installation.
The Consumer Product Safety Commission warns that water above 120°F can burn skin, with children and elderly facing particular vulnerability. After installing new shower valves or faucets—especially single-handle mixing valves—verify your heater setting hasn’t crept upward during the project. High-temperature settings also accelerate mineral buildup and tank corrosion, shortening appliance lifespan.
When installing new fixtures, particularly shower valve cartridges, ensure the balancing spool moves freely—mineral buildup from high-temperature settings can freeze these mechanisms, eliminating scald protection when you need it most. Test both maximum temperature and pressure balance by simultaneously flushing a toilet while running the shower; the temperature should remain stable within a few degrees.
How does new installation affect temperature? Adding restriction points or changing pipe diameter alters flow rates, which can make hot water arrive faster or slower at fixtures, changing the perceived temperature at the tap. After any supply-line work, recalibrate your water heater to 120°F, then test each fixture with a thermometer to confirm safe delivery temperatures. Installing thermostatic mixing valves at showers adds another layer of scald protection, automatically compensating for pressure fluctuations that could otherwise send a surge of hot water through the line.
These steps embody how to avoid plumbing mistakes that endanger family safety. If you’ve installed high-efficiency fixtures that restrict flow rates, you may need to adjust heater settings slightly higher to reach distant bathrooms, but never exceed temperatures that risk burns. Always install temperature-pressure relief valves on tanks and verify their discharge lines terminate safely—this prevents explosive tank failures while ensuring your hot water system operates within safe parameters.
Excavation Safety: Calling 811 Before You Dig
Trenching for a new water service line or drainage field without knowing what lies beneath is among the most dangerous DIY plumbing errors to avoid. The Department of Transportation’s PHMSA administers the Call 811 program, requiring homeowners to contact 811 before any excavation work.
This free service connects you to local utility operators who will locate and mark underground electric, gas, water, and communication lines. Striking a buried gas main or electrical conduit carries fatal risks, while severing existing water mains floods your property and cuts service to neighbors. Excavation damage remains a leading cause of pipeline incidents nationwide.
What should you do before digging? Dial 811 at least two business days before breaking ground—though specific state timelines vary, calling early ensures adequate response time. Wait for marked lines, then dig carefully with hand tools near indicated utilities. Respect the marks by maintaining safe clearance during your trenching. This step demonstrates how to install plumbing correctly by prioritizing safety over speed. Never assume you know where lines run based on above-ground visual cues; utilities often deviate from straight paths after installation.
Keep the marked area clear until work completes, and if marks fade or weather washes them away, call 811 again for re-marking. Document your call confirmation numbers in case disputes arise regarding line locations. Responsible excavation separates competent DIY projects from catastrophic headlines, ensuring your new lines integrate safely with existing infrastructure.
Your Action Plan: Permits, Inspections, and When to Hire a Pro
Deciding between DIY and professional installation requires honest assessment of code complexity and permit triggers. If your project involves new supply lines, drain relocation, or gas connections, you likely need permits and inspections under ICC model codes. These requirements exist for costly plumbing repairs prevention, ensuring work meets safety standards before walls close.
Do you need a permit to move plumbing or install new supply/drain lines? Generally, yes—any modification to the fixed piping infrastructure requires AHJ approval. This plumbing installation guide recommends hiring licensed professionals when work exceeds your tool inventory, when local codes require specialized testing equipment, or when you encounter galvanized steel, cast iron, or lead service lines requiring abatement protocols.
Final checklist for verifying AHJ requirements: First, confirm which model code your jurisdiction follows and whether amendments affect residential work. Second, determine inspection scheduling—rough-in, pressure test, and final approval stages. Third, verify if your homeowner’s insurance requires licensed contractor work for coverage validity. Remember that EPA data shows leaks waste 10,000+ gallons annually; correct installation prevents these losses. When permits are necessary, the filing fee pales compared to the price of remediation after a failed DIY attempt.
When reviewing contractor bids, verify they include permit fees and inspection scheduling in their quotes. Request documentation of their general liability and workers’ compensation insurance before work begins. Keep final inspection sign-off documents with your home records—these prove code compliance to future buyers and insurers, potentially increasing resale value while confirming your project meets the plumbing best practices that prevent future failures.
For simple fixture replacements using existing shut-offs, DIY typically works safely. However, when copper soldering, DWV modifications, or pressure testing enters the equation, professional expertise ensures your investment meets code and functions reliably for decades. Hire pros for gas lines, main sewer replacements, and anything requiring trenching near neighboring properties. Protect your home by knowing your limits and respecting the regulatory framework designed to keep water where it belongs.